I'm just a 15 year old high school student in the Philadelphia suburbs with a love for food. I have an apprenticeship at Lacroix at the Rittenhouse, and will be writing about my experiences there, as well as anything else that strikes my palate.
Wednesday, March 24, 2010
Monday, March 22, 2010
Fun with food
I think cooking is the most fun when you're experimenting. When you're doing your own thing. When you're not constrained by a cookbook.
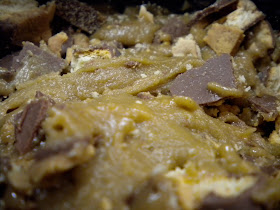
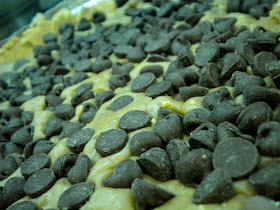
My sister and I have been doing this recently. We've been playing with food: having fun with it. My favorite recent creation of ours was blondie batter, mixed with chopped up peanut butter girl scout cookies, baked in a graham cracker crust, then topped with chocolate chips. It's childrens' food. It's playful. It's fun. And it's altogether over the top, but that's the appeal.
Note: These blondies do not contain baking powder. They are extremely dense and rich and are certainly not for the feint of heart. Proceed with caution.
Cookie Blondies
1 cup chopped Cookies (I used the chocolate peanut butter girl scout cookies)
1 stick butter
1 cup brown sugar
1 egg
1 cup flour
1 tsp salt
1tsp vanilla
1. Melt butter over low heat in a sauce pan.
2. Add sugar and mix thoroughly.
3. Add egg, vanilla and salt. Mix.
4. Fold in flour then cookies.
Graham Cracker Crust (from Martha Stewart)
6.5 oz graham crackers
5 tbs melted butter
1/4 cup sugar
pinch salt
1. preheat oven to 350
2. combine all ingredient in a food processor and pulse until well combined.
3. Press down into a 9 inch pie dish.
4. Bake 8 minutes (the recipe calls for 12-14 but it will get plenty cooked when is goes back in with the blondies.
For Final Product.
1. Spoon blondies into crust top with chocolate Chips and bake 25-30 minutes. I usually go 25 cause I like them gooey in the middle.
Friday, March 19, 2010
School Paper Article 3/19/10
Here's the latest article that I wrote for my school paper (it hasn't been edited or published yet).
So now that we have established that you should make your own crust, we may talk method. Pie Crust is very versatile and varieties range from bacon fat pie crust for quiche, to graham cracker crust for cheesecake but for now I’d like to focus on an all butter pie crust perfect for fruit pies. Shortening increases flakiness in crusts, but butter provides more flavor, and an all-butter crust can be flaky if prepared correctly. The trick is keeping everything cold—I freeze the pie plate before adding the crust—and though you can use the crust immediately, I like to refrigerate it while I prepare the filling. This recipe is easiest to make with a KitchenAid mixer, but it can also be prepared by pinching together the butter and the flour and then stirring in the ice water. This recipe makes enough for a double-crust pie. Before baking I like to brush the top crust with a beaten egg and sprinkle it with sugar. Also, if you plan to make apple pie with this crust, use apple juice rather than water.
All-Butter Pie Crust
2 Cups Flour
2 sticks butter (cut into cubes and frozen)
¼ cup sugar
Ice Water (have at least two cups)
Pinch of salt
1. In a KitchenAid mixer with the paddle attachment, beat together salt, sugar and flour.
2. Add butter gradually, and beat on low speed until the butter cubes are slightly larger than peas.
3. Gradually pour in the ice water until the dough just comes together. Don’t add too much.
4. Push together the dough and use immediately, refrigerate for up to three days, or freeze indefinitely.
5. Roll out.
6. And you’re done. Really. That’s it.
Pie Crust Perfection
The ability to prepare a pristine pie crust is a premier skill to possess, yet few people can. This ability is almost irrelevant nowadays. The use of pre-made pie crusts is so prevalent, I can’t think of one person who prepares their own from scratch. That’s a shame. It’s extremely easy—it requires little culinary competence—and the time you sacrifice will be made up tenfold in flavor and potentially, flakiness. Sure the store-bought versions are acceptable, but they are just that and since everyone uses them, using one puts a limit on the greatness that a pie made with said crust can achieve.So now that we have established that you should make your own crust, we may talk method. Pie Crust is very versatile and varieties range from bacon fat pie crust for quiche, to graham cracker crust for cheesecake but for now I’d like to focus on an all butter pie crust perfect for fruit pies. Shortening increases flakiness in crusts, but butter provides more flavor, and an all-butter crust can be flaky if prepared correctly. The trick is keeping everything cold—I freeze the pie plate before adding the crust—and though you can use the crust immediately, I like to refrigerate it while I prepare the filling. This recipe is easiest to make with a KitchenAid mixer, but it can also be prepared by pinching together the butter and the flour and then stirring in the ice water. This recipe makes enough for a double-crust pie. Before baking I like to brush the top crust with a beaten egg and sprinkle it with sugar. Also, if you plan to make apple pie with this crust, use apple juice rather than water.
All-Butter Pie Crust
2 Cups Flour
2 sticks butter (cut into cubes and frozen)
¼ cup sugar
Ice Water (have at least two cups)
Pinch of salt
1. In a KitchenAid mixer with the paddle attachment, beat together salt, sugar and flour.
2. Add butter gradually, and beat on low speed until the butter cubes are slightly larger than peas.
3. Gradually pour in the ice water until the dough just comes together. Don’t add too much.
4. Push together the dough and use immediately, refrigerate for up to three days, or freeze indefinitely.
5. Roll out.
6. And you’re done. Really. That’s it.
Monday, March 15, 2010
ENTER THE BATTER
My blondies mixed with a cup of chopped Tag Along Girl Scout Cookies, topped with chocolate chips, then baked in a graham cracker crust.
Wednesday, March 10, 2010
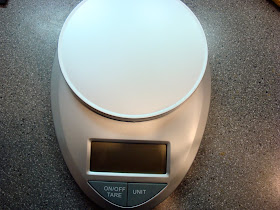
EatSmart Scale
For a while now I've been a fan of measuring ingredients by weight as opposed to volume. It's not only more accurate, but also easier and less messy and makes it easier to see the ratios of ingredients that combine to give your creation identity.
I recently tried out a scale from a company called EatSmart. At $25 on Amazon it's a definite bargain, yet it performs no worse than my $50 Williams-Sonoma scale. Anyone thinking about buying, check this out.
Thursday, March 4, 2010
Peanut Butter Cookies Recipe
Last Friday night, after I had returned from my friend's house, I found myself at home, eating Chunky Peanut Butter Company Peanut Butter, from the jar, with a spoon. And then it hit me. I had done the same thing the previous Friday night, and the one before that. But really, who hasn't?
These peanut butter cookies however, serve as a sweet and suitable substitute. I find that my biggest problem with peanut butter cookies is that they are too crumbly--they turn to sawdust after the slightest bite. To combat this complication, I use 100% brown sugar, and I am 95% sure that you will agree with me that these are better. They remain somewhere in the middle between ultra-crumbly and ultra-chewy--they are slightly chewy, but the texture isn't so far from the traditional.
Also I think that plain peanut butter cookies are, well, plain, and that their flavor is heightened immensely by the addition of either a mini Reese's peanut butter cup, or a piece of good dark chocolate, but not both--I tried using both on my latest batch and found it to be too much. The chocolate from the Reese's and the dark chocolate conflicted. Choose one or the other. Also, though there is some salt from the peanut butter, I add a sprinkle of fleur de sel on top, just for kicks.
Otherwise my cookies are pretty basic, nothin too fancy. I hope that they may be for you, as they are for me, an outlet for my peanut-butter passion.
Peanut Butter Cookie Recipe
1 1/4 cups all-purpose flour
3/4 teaspoon baking soda
1/2 teaspoon baking powder
1/4 teaspoon salt
1/2 cup unsalted butter, softened
1 cup peanut butter (chunky or smooth)
1 1/4 Cup Dark Brown sugar
1 large egg
2 teaspoons vanilla extract
Reese's peanut butter cups or dark chocolate for topping
Fleur De Sel
1. In the bowl of a kitchenaid, mix together the flour, baking soda, baking powder and salt on low speed for a whole minute. Remove to a bowl.
2. Mix together the butter, peanut butter and sugar and beat for 5 minutes (creaming correctly really isn't a huge deal here).
3. Add the egg and vanilla.
4. Slowly add the flour.
5. Scoop onto plates, top with Reese's and freeze for 30 minutes.
6. Bake at 350 for 12 minutes. DONT OVERBAKE!
7. Enjoy!
Wednesday, March 3, 2010
Monday, March 1, 2010
Mac and Cheese
I recently said that Fried Chicken, Mac and Cheese and Biscuits is my favorite meal, and so after I made the chicken, I chose to revisit mac and cheese. I've always been happy with Alton Brown's recipe, but after a recent attempt, I find it rather one-note and not as interesting or enticing as I remembered. Maybe the cheddar wasn't good enough, I don't know, but from now on, I want a mac and cheese made with multiple cheeses; simple can be good, but if I'm going to go to the trouble of making it myself, it has to be more complex.
I'm also contemplating the ways I can get more flavor into it. Maybe steep the milk in thyme, sage and garlic before making the roux. Maybe when making the roux I brown the butter before adding the flour. I think that adding caramelized onions would heighten the complexity without going over the top, however I'm not sure whether bacon deserves a place in mac and cheese. Maybe to supplant that smoky flavor I use smoked cheese. Lastly, the mac and cheese must have a thick crispy crust, which means plenty of panko.
These are all things to play around with, but in the meantime, does anyone have a recipe they can swear by? Is Ina Garten's, Martha Stewart's, the Lee brothers' mac attack any good? E-mail me or drop a comment.